
by Jan Rutgers
In today’s visually driven world, captivating images can make all the difference when showcasing your kitchen designs.
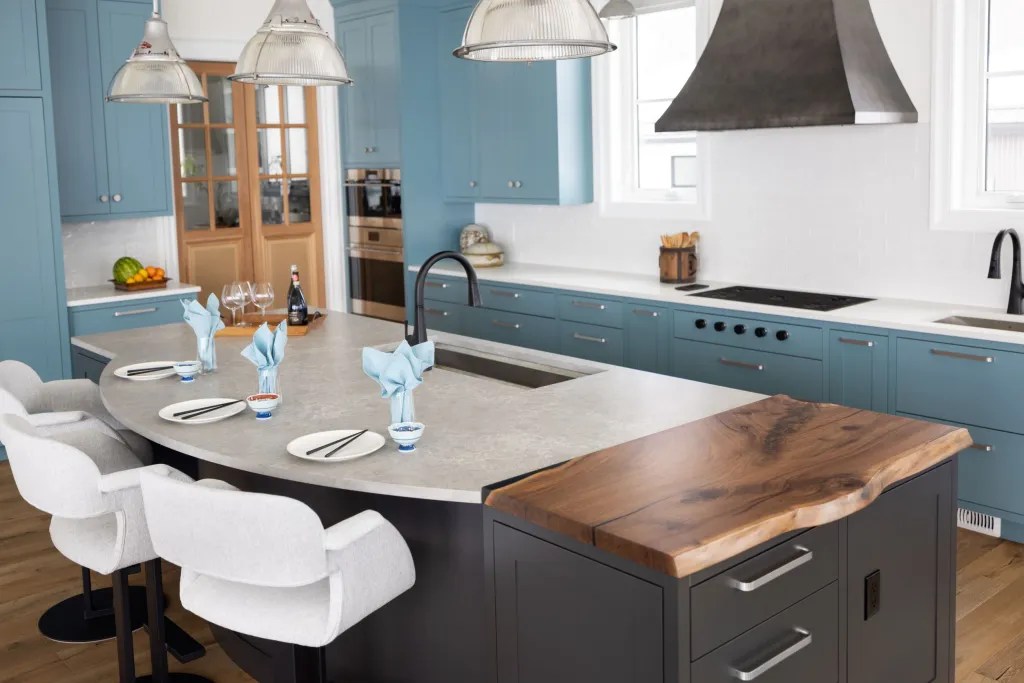
To create stunning kitchen visuals, proper accessorizing is key.
From styling countertops to selecting the right props, this blog post will guide you through the process of accessorizing a kitchen for a flawless photo shoot.
Get ready to transform your latest kitchen design into a picture-perfect space!
10 Steps to a Picture Perfect Kitchen


With most kitchen designer’s marketing revolving around social media, it is important to capture your designs in the best possible way.
Follow these 10 steps to get the most Instagram worthy pics!
1. Clean and Declutter

Before starting the accessorizing process, it’s essential to ensure a clean and clutter-free kitchen.
Remove any unnecessary items from countertops, clear away dishes, and wipe surfaces for a pristine look.
Decluttering allows your accessories to shine and ensures that the focus remains on the key elements of the kitchen you want to highlight.
Starting with a clean slate allows you to layer in the accessories to get the best look.
2. Establish a Theme or Style


Consider the overall aesthetic or theme you want to convey through your kitchen photos.
Are you going for a rustic, modern, or minimalistic look?
Establishing a cohesive style helps guide your accessory choices.
Select props, colors, and textures that complement the kitchen’s design, creating a harmonious and visually appealing composition.
3. Show Off Fresh Produce


Bringing in fresh fruits, vegetables, and herbs can add a pop of color and freshness to your kitchen photos.
Arrange a bowl of vibrant oranges or a bunch of fragrant herbs on the countertop or kitchen island.
This not only adds visual interest but also evokes a sense of a lively and well-utilized space.
4. Include Stylish Cookware and Utensils


Utilize elegant and well-designed cookware, such as copper pots or enameled cast-iron pans, to add sophistication and visual interest to your kitchen shots.
Hang a few utensils on a utensil rack or display them in a stylish container to create a curated and organized look.
5. Incorporate Thoughtful Displays of Glassware


Glassware can serve as both functional items and eye-catching accessories.
Arrange a set of crystal glasses or colorful tumblers on open shelving or a bar cart.
Play with different heights and groupings to create an appealing composition.
Consider pouring a refreshing beverage to add a touch of movement and liveliness to the scene.
6. Introduce Textiles and Linens


Introduce textiles and linens to soften the kitchen’s aesthetic and add texture.
Display a stack of neatly folded kitchen towels or a decorative tea towel draped over the oven handle.
Place a beautifully patterned table runner or a set of stylish placemats on the dining table to create a welcoming atmosphere.
7. Display Fresh Flowers and Greenery


Incorporating fresh flowers and greenery instantly elevates the ambiance of your kitchen photos.
Choose blooms that complement the color palette of your kitchen and arrange them in vases or jars of varying heights.
Consider placing a small potted herb plant or a vase of fresh-cut flowers near the cooking area for an organic and inviting touch.
8. Provide Thoughtful Lighting


Pay attention to lighting when setting up your kitchen for a photo shoot.
Natural light is ideal, as it brings out the true colors and textures of the space.
Open curtains or blinds to let in as much light as possible.
Additionally, consider adding task lighting or accent lighting to highlight specific areas or features, creating a warm and inviting glow.
9. Play with Props and Accessories


Carefully select props and accessories that enhance the overall composition and tell a story.
This could include vintage kitchen tools, cookbooks, decorative bowls, or a statement piece of artwork.
However, be mindful not to overdo it—keep the focus on the kitchen itself and avoid overcrowding the space with too many accessories.
10. Experiment with Angles and Perspectives


To capture the best shots, don’t be afraid to experiment with different angles and perspectives.
Take close-ups of intricate details, such as textured countertops or a beautifully plated dish.
Capture wider shots to showcase the overall layout and flow of the kitchen. Play with different heights and viewpoints to create visual interest and variety.
Accessorizing a kitchen for a photo shoot requires careful thought and attention to detail.
By following these tips, you can transform your kitchen into a visually stunning space that captures the essence of your design and style.
Remember to keep the focus on the key elements, declutter the space, and select props that complement the kitchen’s theme.
With thoughtful accessorizing and creative composition, your kitchen photos will showcase its beauty and appeal to captivate viewers.
Is accessorizing a big part of your photo shoots? Let me know your approach in comments below.

Jan Rutgers has been designing for over 25 years. Developing functional layouts for every area of the home is her passion. She has designed more than 1000 kitchens in her career, learning valuable skills with each one! Her experience in Kitchen Design, Millwork Manufacturing and Product Development has led her to create VESTABUL SCHOOL OF DESIGN where she educates and mentors people passionate about the Kitchen Design Industry.
